
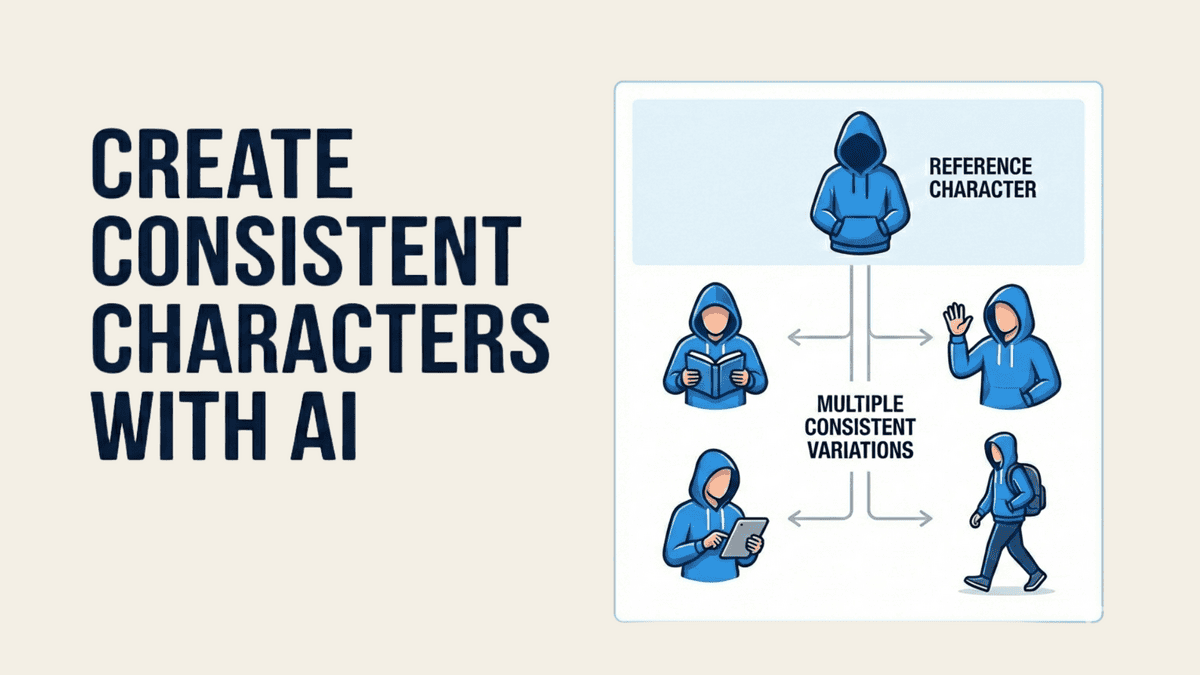
You spend a lot of time creating the perfect AI-generated character. She has the right expression, the exact hairstyle you imagined, even the lighting is spot-on. Then you try to generate her in a different scene, and… you get someone who barely looks related.
This is a common problem a lot of users face.
Here’s the thing though. Getting the same character across multiple images isn’t about luck or regenerating 50 times until something matches. There are actual methods that work.
This guide walks you through the practical workflows, the tools that actually deliver on consistency, and the step-by-step techniques you need to Create Consistent Characters with AI and reuse them everywhere.
Why Character Consistency Matters
If you’re working on a comic or storyboard, your readers need to recognise your protagonist on every page. A character who looks different in each panel breaks the narrative flow, which is why learning how to Create Consistent Characters with AI is essential for comics, storyboards, and visual storytelling.
Content creators building YouTube channels or social media presence around a character face the same challenge. Your character becomes your brand. If they look different in every thumbnail or post, your audience won’t build that connection. They need to see the same face to feel like they’re following a consistent personality.
How to Create Consistent Characters with AI
You need two elements working together: a solid character reference that captures your character’s details, and the right AI techniques to make those details stick.
The process works across most AI image generators, but some handle consistency better than others. We’ll walk you through the step-by-step approach that works regardless of which tool you pick.
Step 1: Choose Your AI Image Generator
Not all AI tools handle character consistency the same way. Some have built-in features like character reference controls and training capabilities, while others require more manual workarounds.
The tool you pick affects how much effort you’ll put into keeping your character looking the same across different images. If you’re planning to create multiple images of the same character, choosing a platform with strong consistency features saves you hours of frustration.
Here are five tools worth considering:
- Gemini: Great for planning your character details and generating solid prompts. It helps you think through specifics before you start creating images. For cartoon-style characters, specialised AI cartoon generator tools can offer style-specific consistency features.
- ChatGPT: Easy to use if you’re new to AI image generation. The image tool is built right into the interface, so you don’t need to learn a separate platform.
- Leonardo AI: The best all-around option for character consistency. It offers multiple models and custom training features that lock in your character’s look.
- Flux: Produces high-quality images with good flexibility. Solid choice if you want quality without too steep a learning curve.
- Midjourney: Creates stunning, artistic images but consistency takes more work. You’ll need to get creative with your prompts and reference images.
Step 2: Create a Character Sheet
Before generating your first image, write down everything about your character’s appearance. This becomes your reference document. Every time you create a new image, you’ll pull details from this sheet to keep things consistent.
Without it, you’re relying on memory, and small details start shifting between images.
What to Include in Your Character Sheet
1. Demographics: Name, Age, Gender, Height and build
2. Physical Details:
- Face shape
- Eye color and shape
- Nose type
- Mouth and lips
- Hair (colour, length, style, texture)
- Skin tone
- Any scars, tattoos, or distinguishing marks
- Glasses or accessories
3. Clothing Style: Signature outfit description, Colour palette, Style preferences, Key clothing items
4. Personality Basics: 3-5 main traits, How they speak, Key behaviors (these help inform poses and expressions)
Example Character Sheet Template
“Name: Sarah Chen
Age: 28
Demographics: Asian woman, 5’6″, athletic build
Face: Oval face shape, warm brown almond-shaped eyes, small nose with slight upturn, full lips with natural pink tone
Hair: Black hair, shoulder-length, straight with subtle layers, usually worn down or in a low ponytail
Skin: Light tan complexion, small mole above right eyebrow
Clothing: Casual professional style, favors navy blazer over white tee, dark jeans, white sneakers. Wears thin gold necklace and small stud earrings.
Personality: Confident, approachable, analytical, slightly introverted”
Step 3: Create Your First Character Image
Now you’ll generate your reference image. This first image becomes the foundation for all future variations. You’re not trying to create the perfect illustration yet. You’re establishing what your character looks like so you can recreate them later.
How to Write a Good Prompt
Use this structure: [Shot type] + [Physical description from your character sheet] + [Clothing] + [Setting] + [Style/quality tags]
Example: “Portrait photograph of an Asian woman, age 28, oval face, warm brown almond eyes, straight black shoulder-length hair, light tan skin, small mole above right eyebrow, wearing navy blazer over white t-shirt, thin gold necklace, neutral background, professional photography, high detail, soft lighting”

Generate Multiple Options
Don’t stop at one image. Here’s what to do:
- Create 4-6 variations using the same prompt. The AI produces slightly different results each time.
- Pick the one that matches your mental image best. Look for clarity in facial features since those are hardest to keep consistent.
- Save this image with a clear filename like “sarah-chen-reference.png” so you can find it easily.
- Note any details that came out differently than expected. Update your character sheet if the AI created something you like better than your original description.
Step 4: Use Consistency Methods to Generate Your Character in New Scenes
You’ve got your reference image and character sheet locked down. Now comes the fun part, putting your character in different scenes while keeping them recognisable.
We’ll walk through all four approaches so you can pick what works for your tool.
Method 1: Character Reference (Best Method)
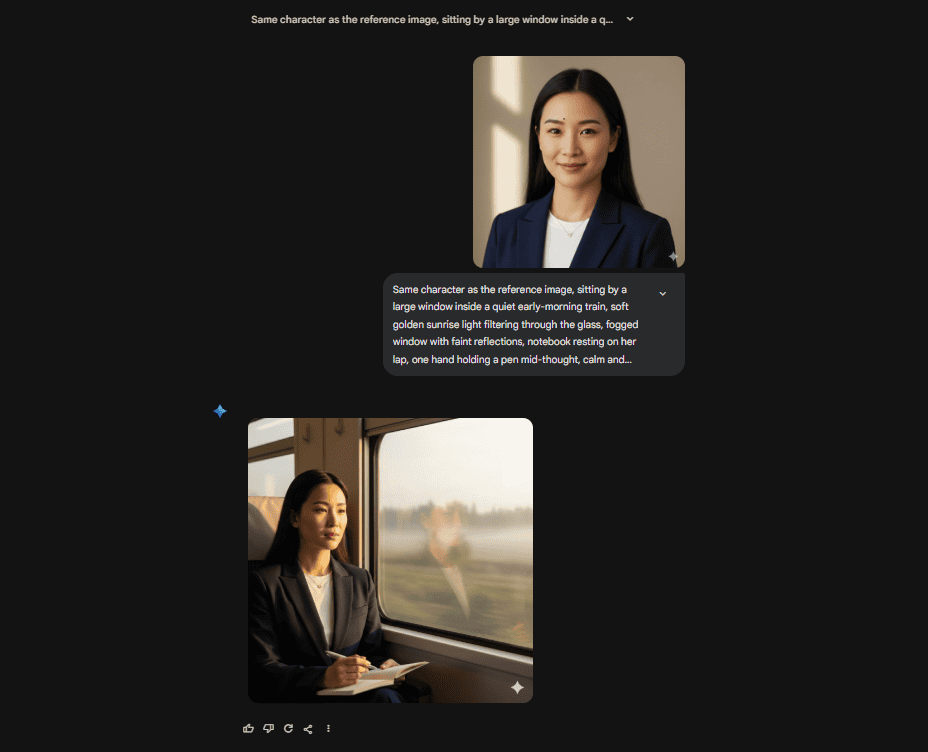
This is the gold standard. You upload your reference image, and the AI uses it as a visual guide for every new generation. The image acts as your “visual anchor” while your prompt guides the scene, pose, and action.
Here’s how to use it:
- Upload your reference image to the tool
- Turn on the character reference feature if available; if not, then mention in the prompt that this is your reference image
- Write your new scene prompt, keeping the core physical features identical
- Add “Same character as reference image” at the start of your prompt
- Describe the new action or setting: “[character name] sitting in a coffee shop, looking out the window, warm afternoon light”
- Generate and adjust strength if the character looks too different or too rigid
Example prompt: “Same character as reference image, Mira standing on a foggy dock at sunrise, hands in jacket pockets, contemplative expression, cinematic lighting”

Method 2: Detailed Prompts (Good for Most Tools)
When your tool doesn’t have a character reference feature, you’ll rely on detailed text descriptions. This means copying the entire physical description from your character sheet into every single prompt. It’s more manual, but it works across almost any AI image generator.
Use this template: “Same character, [name], [all physical features from character sheet], now [new action/scene]”
Full example: “Same character, Mira, woman in her late 20s, shoulder-length wavy auburn hair, bright green eyes, light freckles across nose and cheeks, warm smile, wearing dark green jacket and jeans, now walking through a farmers market carrying a bouquet of sunflowers, golden hour lighting”
Method 3: Seed Number (Quick Method)
Some AI tools like Leonardo AI, let you save a “seed number” from one generation to recreate similar results. Think of it like a code that tells the AI to start from the same creative starting point. The catch? OpenAI’s public API lacks official seed parameters, so this won’t work with ChatGPT’s image generator.
To use seeds:
- Generate your reference image and save its seed number (usually found in image details or settings)
- When creating new images, use that same seed
- Keep your character description word-for-word identical
- Only change the scene or action portions of your prompt
Fair warning: this works best when you want similar poses or angles. Change too much, and the seed can’t maintain consistency.
Method 4: Train a Custom Model (Advanced)
If you’re planning a long comic series, multiple books, or building an AI influencer, training a custom model (called a LoRA) gives you the most control.
You’re teaching the AI what your specific character looks like by feeding it 20-50 images. According to Cutscene AI’s LoRA guide, this costs between $5-50, takes 30 minutes to 4 hours, and requires 20-100 training images.
Here’s the basic process:
- Collect 10-20 images of your character in different poses, angles, and lighting
- Use Leonardo AI’s custom training feature (or similar tools like Civitai)
- Upload your images and start the training process
- Once trained, use your custom trigger word in prompts (like “mira_character” + your scene description)
This method takes more upfront work, but once trained, you can generate hundreds of consistent images just by including your trigger word.
Step 5: Test Your Character in Different Scenes
You’ve set up your consistency method. But here’s the thing, you won’t know if it actually works until you stress-test it. Running your character through different scenarios now saves you from discovering inconsistencies later when you’re deep into your project. Think of it like checking if a recipe works before cooking for guests.
Scenes to Test
Put your character through these variations:
- Close-up portrait
- Full body shot
- Side view / profile
- Different expressions (happy, sad, angry)
- Different poses (sitting, standing, walking)
- Different outfits
- Different lighting
- Different backgrounds
Each scenario pushes your consistency method in a new way. A close-up reveals facial details, while a full body shot tests if the proportions hold up. Side views often break consistency because the AI hasn’t “memorised” that angle as well.
Check Each Image For
Compare your test images carefully. Look for:
- Same face shape
- Same eye color
- Same hair (colour, length, style)
- Same body type
- Same distinctive features (scars, moles, accessories)
- Same overall “feel” and personality coming through
If something’s off, tweak your prompt or adjust your reference image. This trial-and-error phase helps you dial in what works before you start creating the scenes that actually matter.
Creating Consistent Characters With Different AI Tools
You know the process, now let’s watch in happen in real-time with some examples and prompts:
1. ChatGPT
You can use ChatGPT as both a planning tool and a generation tool. The CHARACTER DNA TEMPLATE approach treats your character like a real person with documented features that stay locked across every image.
Step 1: Create Your Character Sheet in ChatGPT
Paste this prompt into ChatGPT:
“You are an AI art director and prompt engineer.
Your job is to design ONE recurring visual character, and to define them so clearly that any model can reproduce them consistently.
1. Ask me 10–15 focused questions about this character’s visual identity only:
– age, gender, ethnicity
– face shape, eyes, nose, mouth, jawline
– hairstyle and colour
– body type and height
– default outfit and colour palette
– notable features (scars, tattoos, accessories)
– default art style (e.g., realistic photo, anime, 3D, watercolour)
2. After I answer, create a structured “Visual Character Sheet” with sections:
– Identity
– Face details
– Hair details
– Body & posture
– Clothing & color palette
– Art style & rendering notes
– NEVER CHANGE list (the core traits that must always remain the same in every image)
Write the sheet so that it can be pasted directly into any AI image prompt.”
Answer ChatGPT’s questions; this becomes your character’s visual blueprint.

Step 2: Generate Image Prompts
Now use this prompt in the same ChatGPT chat:
“Using the Visual Character Sheet we created, extract a compact “identity block” of 1–2 sentences that MUST be included at the start of every AI image prompt for this character.
Requirements for the identity block:
– Mention age, gender, ethnicity
– Precisely describe face, hair, and body type
– Mention default outfit and colour palette
– Mention the art style (e.g., “realistic cinematic photo” or “clean anime illustration”)
Then:
Output the identity block alone and the image prompts.”
ChatGPT will give you an identity block (your character’s core description) and the image prompts. You can also specify what scenes you want.

Step 3: Generate Images
Copy each prompt from ChatGPT one by one and paste them into the chat to get consistent character images:


Paste Prompt 1 → generate image. Paste Prompt 2 → generate image. The character stays consistent because the identity block is identical in every prompt.
2. Gemini
Gemini excels as a meta-prompt generator that can build comprehensive system instructions for your image work. It’s especially useful when you’re planning comics, storyboards, or any project where you need multiple scenes mapped out before you start generating.
Step 1: Choose the Right Gemini Mode
Open Gemini web/app or AI Studio and select an image-capable model (e.g., “Gemini 2.5 Flash”). Stay in a single conversation for the entire project so Gemini can preserve the same character across all prompts.
Step 2: Define Your Character
Paste this prompt into Gemini:
“You are an AI art director for a children’s picture book (change use case).
Design one main character that will appear consistently across the entire book.
Ask me 8–10 questions about the character’s age, gender, ethnicity, face shape, eyes, nose, mouth, hair style and colour, body type, clothing, colour palette, and personality.
Then summarise the answers as a “Storybook Character Sheet” with:
– Identity (name, age, short description)
– Face details
– Hair details
– Body & proportions
– Clothing & color palette
– Expression & personality
– Art style (e.g., “soft watercolour children’s illustration”)
– NEVER CHANGE list for the traits that must remain identical in every image
Write this so it can be reused inside image prompts.”
Answer Gemini’s questions, this becomes your character’s visual blueprint.

Step 3: Generate Your First “Reference” Image
After Gemini creates your Character Sheet, use this prompt:
“Using the Character Sheet above, generate a single image of this exact character.
Requirements:
– Full-body shot of the character standing in a simple, uncluttered background
– Show the face clearly from the front, with their default expression and outfit
– Use the specified art style from the sheet
– Make this the reference look we will reuse for the entire storybook”

Save this image, it’s your reference for all future scenes.
Step 4: Create New Scenes with the Same Reference Image
For each new scene, use prompts like this:
“Now generate a new image using the same character as the previous image, keeping the same face, body type, hairstyle, and clothing colour palette.
Scene: [describe your scene, e.g., “the child is sitting under a big banyan tree reading a book, daytime, soft light”]
Instructions:
– This must be the exact same character, with the same facial structure and proportions
– Keep the same art style as before
– You may change pose and facial expression slightly to match the scene, but keep identity and outfit clearly recognisable”
Key phrase: Always say “the same character as the previous image” or “this exact character again” to maintain consistency.


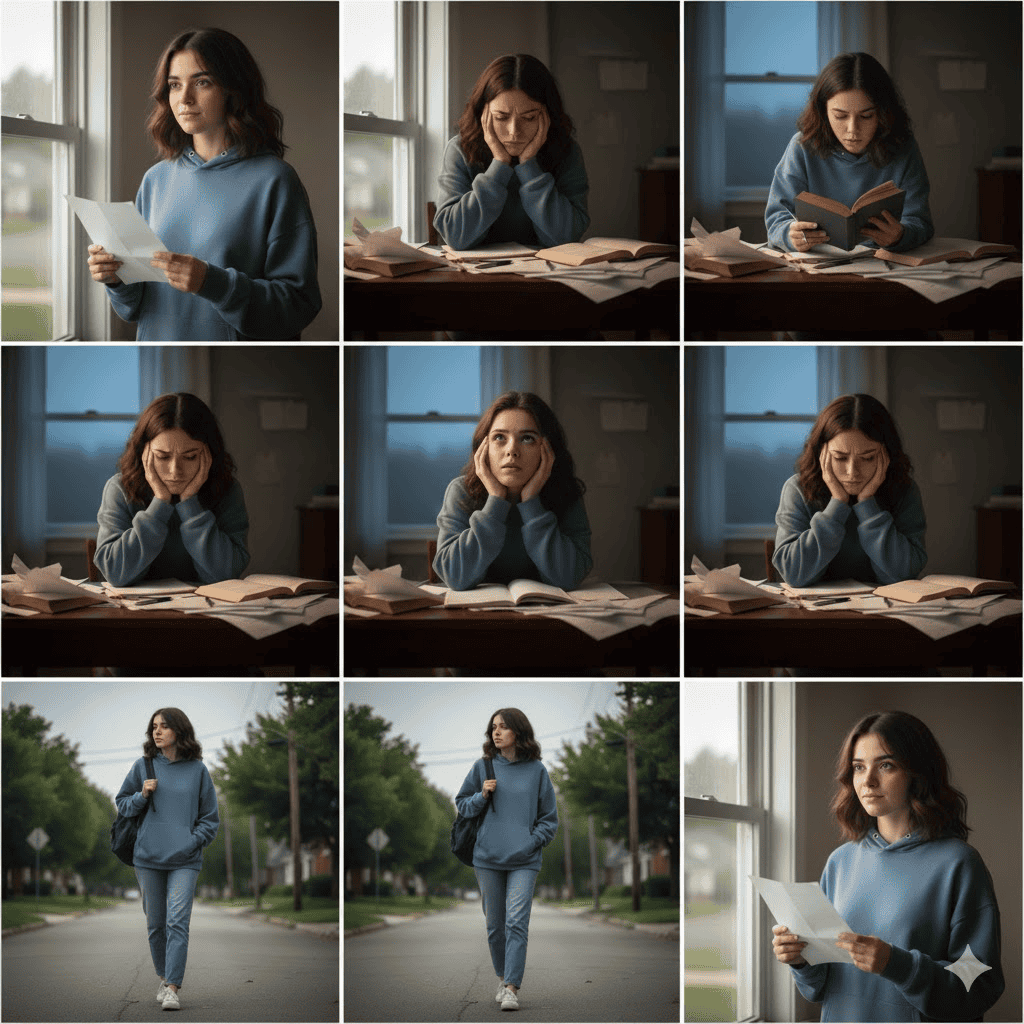
Character Drifting? Fix It
Use this if Gemini starts changing your character’s appearance:
“The last image changed the character too much.
Please regenerate the image, keeping the exact same character from the first hero image and the Character Sheet:
– Same age, facial structure, hairstyle, and outfit colours
– Same art style and rendering
– Only change the pose and background to match this description: [describe your scene]”
3. Leonardo AI
Leonardo AI is where you get actual built-in consistency tools rather than prompt workarounds. It’s designed for this. The platform offers multiple models like Lucid Origin, Flux, and GPT-1, plus custom training options.
Leonardo gives you flexibility to choose the right tool for your specific consistency needs. You’re not fighting against the platform anymore.
Using Character Reference
Leonardo’s character reference feature is basically “here’s who I want, make more images of them.” You upload an existing image, and Leonardo uses it as a visual anchor. This beats typing descriptions because the AI sees exactly what you mean.
Here’s the workflow:
1. Create your base character image using Leonardo (generate from scratch or upload an existing character).
Use prompt like “Tara, 9-year-old Indian girl with a round face, warm brown skin, big dark brown eyes, small button nose, shoulder-length wavy black hair in two low pigtails with yellow ribbons, small gap between her front teeth, slim child body, wearing the same yellow t-shirt with a small star and blue denim overalls, now sitting under a big banyan tree reading a book, soft watercolor children’s book illustration style, full body, soft pastel colors, clean background, highly detailed, sharp focus”

2. Open a new generation and upload that image as a reference using the reference image panel

3. Enable “Character Reference” in the settings panel (it’s a toggle switch)
4. Set reference weight to 70-80% to start (you’ll adjust based on results)
5. Keep core physical description in your prompt: “Same character, [name], [physical features]”. Add new scene details: “sitting in library, reading, warm lighting”
For example, “the same young girl from my character reference image, keeping the exact same face, skin tone, hairstyle with two low pigtails and yellow ribbons, and the same yellow t-shirt with a star and blue denim overalls, now running through a green park with a kite, smiling, soft watercolor children’s book illustration style, full body, soft pastel colors, simple background, highly detailed, sharp focus”
6. Generate and compare to reference (look at face shape, eye color, hair, distinctive marks)

Create more images with your character consistent in each.


The reference weight is your control dial. At 90%, you get near-identical copies. At 60%, you get the general vibe but more creative freedom.
Common Mistakes to Avoid
Most consistency failures happen because of these preventable mistakes. Catch them early, and you’ll save yourself hours of regenerating images that don’t match.
- Vague character descriptions. Saying “pretty face” or “tall guy” gives AI nothing to work with. It needs specifics: “oval face with high cheekbones” or “6’2″ with broad shoulders.” The more precise you are, the more consistent your results.
- Changing your prompt structure between generations. If you list hair colour first in one prompt and last in another, AI treats that as a signal to change priorities. Stick to the exact same formula every time.
- Skipping the character sheet step. Trying to remember details from your head causes drift fast. Write it down once, copy-paste forever.
- Not testing different scenarios before committing. Generate your character in at least 3-4 different poses and lighting conditions. If consistency breaks during testing, it’ll break during your actual project.
- Using inconsistent terminology. Calling hair “auburn” in one prompt and “reddish-brown” in the next confuses AI. Pick one term and stick with it throughout your entire project.
- Ignoring distinctive features. That scar above the left eyebrow or that silver ring on the right hand? Those details make characters recognisable. Include them in every prompt.
- Setting the reference strength too low. Anything below 60% lets AI wander too far from your original. Start at 70-80% for tight consistency.
- Not saving reference images and seed numbers. You’ll kick yourself when you need to recreate a character and can’t remember which image or settings you used.
- Switching tools mid-project without adapting. Midjourney prompts don’t work the same in DALL-E. If you switch platforms, rebuild your workflow from scratch.
- Over-relying on AI memory without explicit reminders. Even tools with memory features need you to repeat key details in your prompts. Don’t assume it remembers everything.