
Looking up how to add skills to Gemini CLI? The short answer: in Gemini CLI, run gemini skills install. In Antigravity, drop a folder into .agents/skills. That covers both tools.
No skill to add yet? Use the free AI skill generator to write one from your own examples, then unzip it into .gemini/skills or .agents/skills.
One thing first. The Gemini CLI skills docs carry a banner: unpaid tier and Google One users were moved to Antigravity CLI on June 18th, 2026. If that’s your plan, follow the Antigravity skills documentation steps instead. The banner says nothing about other plans, so check your own screen before you start.
How To Add Skills To Gemini CLI
The install command does most of the work here. Three steps and the skill is in.
- Run
gemini skills install https://github.com/user/repo.git --consent, using the skill’s own repo address. - Set where the skill lives. Add
--scope workspaceto that command to keep it in one project. Leave that out and the default scope isuser. Add--pathif the skill sits in a subfolder of the repo. - Check it with
/skills list. Run/skills reloadif needed.
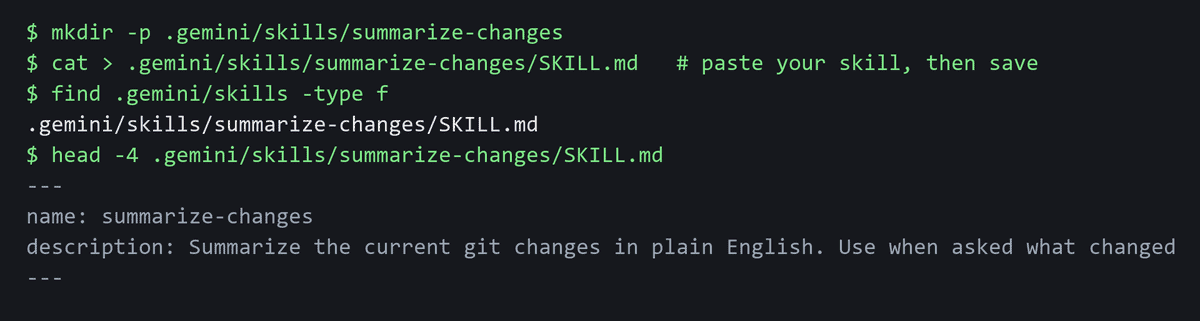
Not installing from a repo? Create the folder yourself. Make .gemini/skills/<name>/SKILL.md. The .agents/skills/ folder works too. Want the skill on every project instead of just one? Put it in ~/.gemini/skills/ or ~/.agents/skills/.
To build a new skill, just ask Gemini CLI to create one. It uses its built-in skill-creator. To remove a skill later, run gemini skills uninstall my-skill --scope workspace.
How To Add Skills To Antigravity
Antigravity works differently. There is no skill install command here. You place the skill folder by hand.
- Pick where the skill lives. Use
<workspace-root>/.agents/skills/<skill-folder>/for one project. Use~/.gemini/config/skills/<skill-folder>/for every project. - Add a
SKILL.mdinside that folder. Thedescriptionfield is required. Thenamefield is optional and defaults to the folder name. - In the CLI, run
/skills reload. Or start a new conversation.
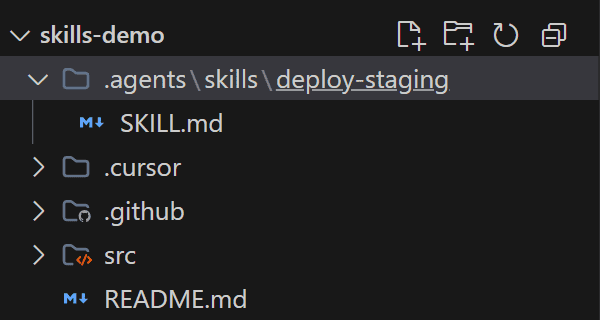
.agents/skills/deploy-staging/SKILL.md, open in the Antigravity IDE Explorer.In the Antigravity IDE, type / in the Agent panel. Skills from .agents/skills show up in that list.
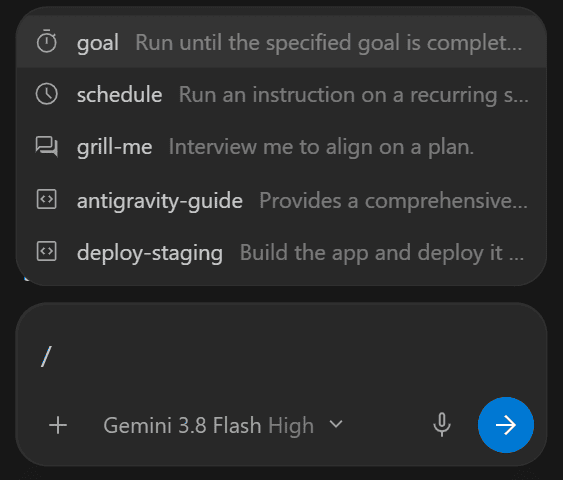
/ menu in the Antigravity IDE Agent panel, with deploy-staging from the project folder at the bottom.Skills can also come in through plugins. Run agy plugin install <plugin-name>, or agy plugin install https://github.com/<owner>/<repo>.
Coming over from Gemini CLI? Project skills sitting in .gemini/skills/ must move to .agents/skills/ before Antigravity shows them as slash commands. Global skills in ~/.gemini/skills/ still work where they are. The Antigravity CLI migration docs cover the rest.
Where Skills Live
Here is the full path list in one place. Pick the row for your tool and the column for where you want the skill.
Tool | Project | Personal |
|---|---|---|
Gemini CLI | .gemini/skills/ or .agents/skills/ | ~/.gemini/skills/ or ~/.agents/skills/ |
Antigravity | .agents/skills/ | ~/.gemini/config/skills/ |
Project skills stay inside one project. Personal skills sit in your home folder and work across all of them.
How To Start A Skill
In Gemini CLI, there is no direct command to start one. The docs show the model picks a skill when your task matches its description. You then get a confirmation prompt before it runs.
In Antigravity, type /<skill-name>, like /deploy-staging, or let the agent apply it on its own. In the Antigravity IDE, open the Customizations menu in the agent side panel to see active skills.
Check A Skill Before You Add It
A skill can include instructions and code. That is more than a text prompt. So treat adding one like installing software. Snyk scanned 3,984 skills and found 534 with at least one critical issue. It also confirmed 76 malicious payloads. The Snyk report on malicious AI agent skills has the full numbers.
Three checks before you add anything:
- Check who made it. A skill from an unknown source is the bigger risk.
- Read the
SKILL.mdfirst. That file holds the skill’s instructions. - Look at any scripts in the folder before you add the skill.
New to this? Read what an AI agent is, or see what MCP is if you need your agent to reach other apps.
Now open Gemini CLI or Antigravity and add one small skill first.