
Here is how to add skills to Cursor. A skill is just a folder with a SKILL.md file inside. Drop it in .cursor/skills and Cursor loads it, or run /create-skill and Cursor builds one for you.
No skill to add yet? Use the free AI skill generator to write one from your own examples, then unzip it into .cursor/skills.
The steps below come straight from Cursor’s skills documentation, which mention no plan limit for skills.
How To Add Skills To Cursor
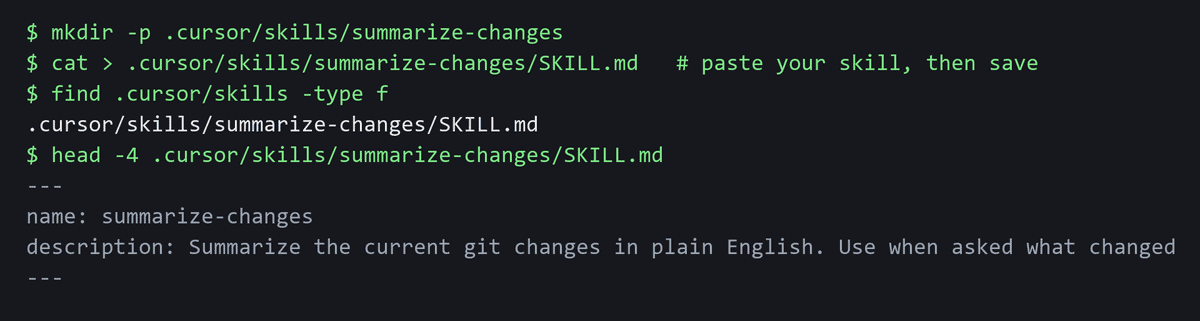
Adding one by hand takes three steps.
- Make the folder. In your project, create
.cursor/skills/<skill-name>/. The middle part is your skill’s name, like.cursor/skills/code-review/. Want the skill to show up in every project? Put it in~/.cursor/skills/instead. - Add the file. Save a
SKILL.mdinside that folder. The name in the file must match the folder name. - Check that it is listed. Open Customize in the sidebar, then Skills. Your skill should sit in that list.
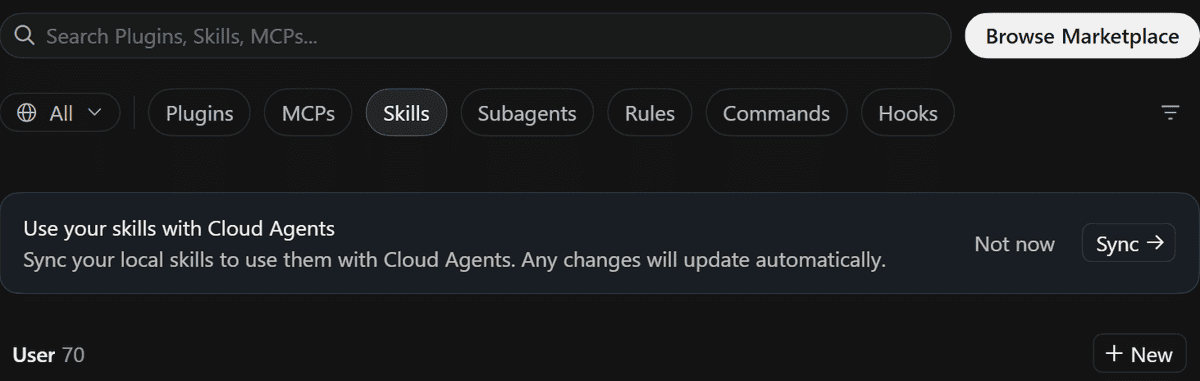
Now the shortcut. Type /create-skill in Agent chat. Cursor builds the structure and the SKILL.md for you. Same result, less typing.
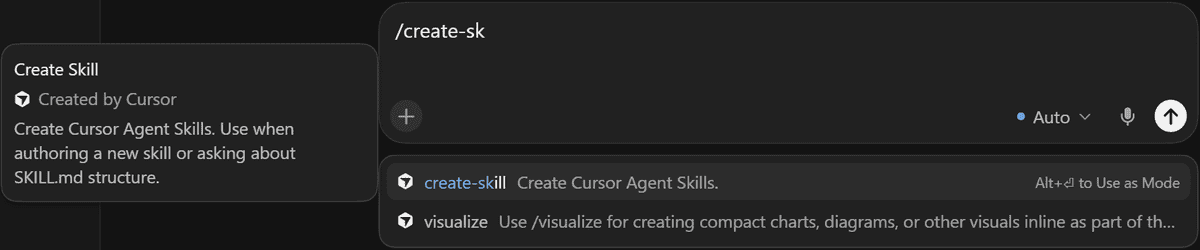
/create-sk in a new Cursor chat brings up the built-in create-skill skill. Alt+Enter uses it as a mode.Coming from Claude Code or Codex? Cursor reads those skills too. For compatibility it also loads .claude/skills/, .codex/skills/, ~/.claude/skills/, and ~/.codex/skills/. So a folder you already keep there can work here without any copying.
How To Add Skills From GitHub
Skills are not imported on their own. The docs say a GitHub repo must be packaged as a plugin first. That means it needs a .cursor-plugin/marketplace.json file. With that in place:
- Open Customize.
- Choose From GitHub Repository.
- Install the plugin.
Teams can add a team marketplace instead. If all you have is a plain skill folder on GitHub, copy that folder into .cursor/skills/.
Where Cursor Stores Skills
Cursor looks in a fixed set of folders. The folder you pick decides where the skill works.
Scope | Paths |
|---|---|
Project (this project only) | .agents/skills/, .cursor/skills/ |
Personal (all your projects) | ~/.agents/skills/, ~/.cursor/skills/ |
Compatibility (Claude Code and Codex) | .claude/skills/, .codex/skills/, ~/.claude/skills/, ~/.codex/skills/ |
So pick the row that fits how widely you want the skill available.
How To Start A Skill
Once the skill is listed, starting it is simple. Type / in Agent chat and search for the skill name. That attaches it to one message only.
Want it on for a whole session? Use it as a Custom Mode. Press Option+Enter on Mac or Alt+Enter on Windows.
The agent can also apply a skill by itself. It will skip that if the skill’s frontmatter sets disable-model-invocation: true.
If A Skill Does Not Show Up
Work through these checks in order.
- Confirm the folder sits in one of the paths listed above.
- Check the file is named
SKILL.md, and that the name inside matches the folder name. - Agent never picks it on its own? Look for
disable-model-invocation: truein the frontmatter, or start the skill yourself with/. - On Cloud Agents for Teams and Enterprise, an admin may have switched off Sync Skills for Cloud Agents. That setting sits in Team Settings under Security & Identity.
Check A Skill Before You Add It
Getting a skill to show up is one thing. Trusting it is another. A skill can carry instructions and code, so treat adding one like installing software. In one scan, Snyk checked 3,984 skills and found 534 with at least one critical issue. It also found 76 confirmed malicious payloads.
Run these three checks first:
- See who made it. A known source is safer than a random folder.
- Read the
SKILL.md. The instructions should match what you want the skill to do. - Look at any scripts. Code runs on your machine, so know what it does before it runs.
Need help wording what the skill should do? The Cursor prompt generator can write a prompt for you.
Want a skill to try? Start with our list of anti AI slop skills.
Then open Cursor and add one small skill first.